How to Preheat Bella Air Fryer Step-by-Step Guide 2026
Properly preheating your Bella air fryer ensures your food cooks evenly and achieves a crispy texture. Most Bella air fryer models require a 3 to 5-minute preheat cycle at your target cooking temperature before adding food to the basket.
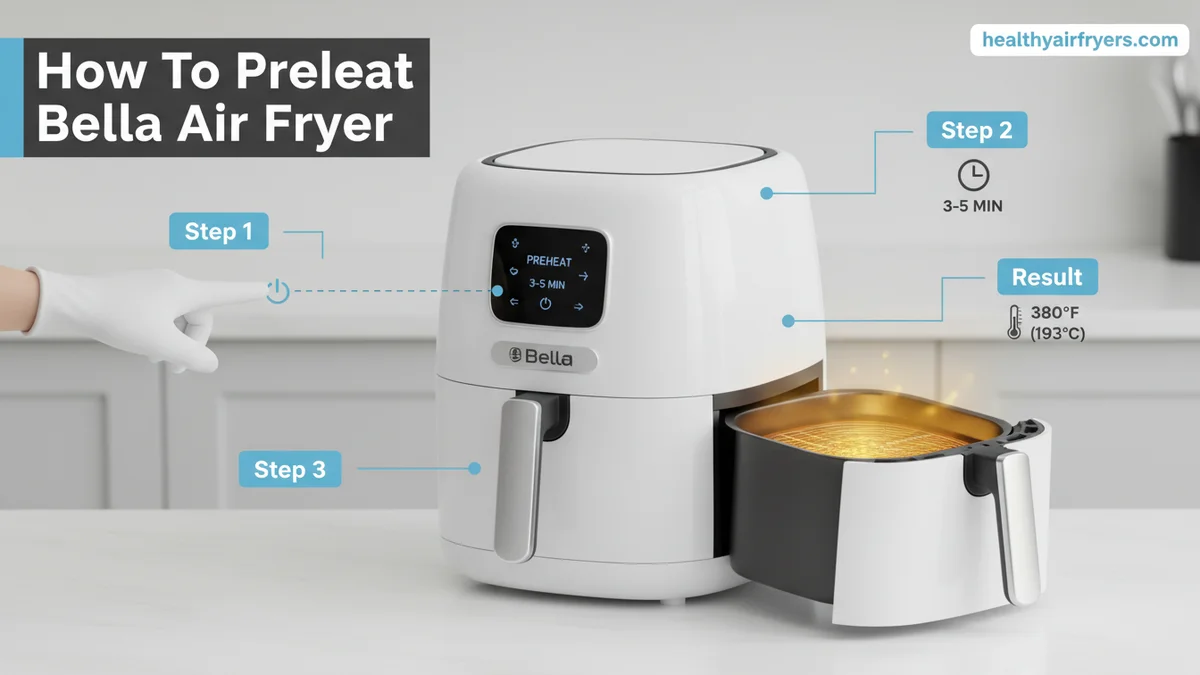
To preheat your Bella air fryer, turn on the appliance, set your desired cooking temperature, and run it empty for 3 to 5 minutes before adding your food. This quick heating cycle ensures the basket reaches the optimal cooking temperature instantly, preventing your food from steaming or sticking.
Skipping this vital step often leads to unevenly cooked meals and extended cooking times. Whether you bought a brand-new Bella model in 2026 or you are pulling a trusted unit out of your pantry, mastering the preheat cycle guarantees that your frozen snacks, vegetables, and proteins achieve that coveted crispy exterior right from the start.
Key Takeaways
- Preheat your Bella air fryer for 3 to 5 minutes before adding any ingredients.
- Digital touchscreen models often feature a dedicated preheat button for automatic timing.
- Analog dial models require manually setting the timer and temperature to heat the empty basket.
- Never spray aerosol cooking oils directly onto the non-stick basket coating.
- Always keep the empty basket securely inserted into the unit during the preheating phase.
Why Your Bella Air Fryer Needs Proper Preheating
The Science of Instant Searing
When you place food into a cold air fryer basket, the internal temperature climbs slowly. This gradual heating allows moisture to escape from your food before the surface can crisp up, resulting in a soggy texture. Preheating your Bella air fryer ensures that the heating element and the basket are already radiating intense heat the second your ingredients land inside. This triggers an immediate Maillard reaction for proteins and a fast crisp for starches.
Consistent Cooking Times
Recipe cooking times assume a hot cooking chamber. If you skip the preheat phase, your food spends the first few minutes simply warming up rather than cooking. By establishing a reliable preheat routine in 2026, you can trust your recipe timers completely. Here are the core benefits of running a short preheat cycle:
- Ensures accurate cooking times matching your recipe instructions.
- Stops delicate batters and breadings from sticking to the mesh basket.
- Renders fats out of meats faster for a superior, non-greasy crunch.
- Guarantees even heat distribution across crowded batches of food.
Master Bella Air Fryer Preheating in 6 Simple Steps
Preheating your Bella air fryer is the secret weapon to achieving that irresistible, restaurant-quality crunch every single time you cook. While some air fryer recipes claim you can skip this crucial phase, taking a few minutes to heat up your appliance ensures that your food starts searing and crisping the exact second it hits the basket, rather than slowly steaming as the chamber warms up. This comprehensive guide will walk you through the exact process of safely and effectively preheating your Bella air fryer, optimizing cooking times, and avoiding common pitfalls.
Step 1: Position Your Air Fryer Safely
What you need: A flat, heat-resistant countertop surface, clearance space of at least 5 inches around the appliance, and a nearby electrical outlet.
Instructions: Before plugging in your Bella air fryer, place it on a stable, level, and heat-resistant surface away from walls, cabinets, and other appliances that could be damaged by heat or steam. Ensure that the air intake vents on the top and the exhaust vents on the back are completely unobstructed. Plug the power cord directly into a standard 120V wall outlet. Avoid using extension cords, as the high wattage required by air fryers can cause power surges, overheating, or tripped circuit breakers in your consumer-updates/safe-food-handling-kitchen-appliances” target=”_blank” rel=”noopener noreferrer” title=”FDA safe kitchen appliance handling guidelines”>kitchen.
Pro Tip: Never place your air fryer directly on a stovetop, even if it is turned off, as accidental burner activation can melt the plastic housing and create a severe fire hazard.
Step 2: Inspect and Clean the Basket Assembly
What you need: The Bella air fryer basket, crisper tray, mild dish soap, and a soft sponge.
Instructions: Pull the basket assembly firmly out of the main air fryer body. Inspect the interior to ensure no leftover food debris, packaging materials, or grease from previous meals are trapped inside. Even if the basket looks clean, a quick wipe down or wash with warm soapy water removes dust. Ensure the removable crisper tray sits flat and snug at the bottom of the basket, utilizing its rubber silicone feet to prevent scratching the non-stick coating. Dry all components thoroughly before sliding the basket back into the unit.
Pro Tip: Never use metal utensils, scouring pads, or abrasive cleaners on your Bella air fryer basket, as this will permanently ruin the non-stick coating and cause food to stick.
Step 3: Power On the Appliance
What you need: Your plugged-in Bella air fryer.
Instructions: Locate the power button on the digital touch panel or the mechanical dial interface of your specific Bella air fryer model. Press the power button once to illuminate the control panel display. The screen should light up, showing default time and temperature settings—typically 400°F (200°C) and 15 minutes. If your model uses mechanical dials, do not turn them yet; simply ensure the unit is receiving power and the fan begins a low, ambient hum, indicating the internal electronics are active and ready for input.
Pro Tip: If your display fails to light up, pull out the basket completely and push it back in firmly until you hear a distinct click. Bella air fryers feature a safety microswitch that prevents operation if the basket is not fully sealed.
Step 4: Set the Target Preheating Temperature
What you need: Your recipe’s required cooking temperature and the air fryer’s temperature controls.
Instructions: Adjust the temperature to match what your specific recipe calls for. For most standard preheating tasks, standard temperatures range between 350°F (175°C) and 400°F (200°C). Use the digital up and down arrows on touch-screen models to increase or decrease the temperature, or turn the mechanical temperature knob to align the desired degree marker with the indicator line. Giving your air fryer the exact temperature it needs before food introduction ensures proper thermal shock, which instantly locks in juices for meats and creates a crispy crust for breaded items.
Pro Tip: Always preheat to the exact temperature specified in your recipe. If you are converting a traditional oven recipe to air fryer instructions, a good rule of thumb is to reduce the cooking temperature by 25°F while keeping the preheat standard.
Step 5: Program the Preheating Duration
What you need: Digital or mechanical timer controls.
Instructions: Because air fryers heat up extremely fast due to their compact size and powerful convection fans, you generally only need to preheat a Bella air fryer for 3 to 5 minutes. Use the timer buttons to set the countdown clock to 3 or 5 minutes, depending on how high your target temperature is. For temperatures above 380°F, opt for the full 5 minutes. Press the start/pause button to initiate the heating cycle. You will immediately hear the internal fan whirring loudly and feel heat radiating from the back exhaust vent.
Pro Tip: Do not skip setting a timer during preheat. Leaving an empty air fryer running indefinitely wastes electricity and can prematurely wear down the internal heating element.
Step 6: Add Food and Adjust for Cooking
What you need: Prepared food items ready to be cooked and heat-resistant silicone tongs.
Instructions: When the preheat timer hits zero, the Bella air fryer will typically beep and display “End” or switch off the heating element while keeping the fan running briefly. Carefully pull out the basket handle. The interior will be intensely hot. Quickly add your seasoned food items in a single, even layer onto the preheated crisper tray. Avoid overcrowding the basket, as this blocks airflow. Slide the basket back into the unit immediately, input your actual cooking time and temperature, and press start to begin your meal preparation.
Pro Tip: Work quickly when loading food into a preheated air fryer. Every second the basket is left open, the internal chamber loses valuable heat, which can slightly increase your overall cooking time.
✅ Final Checklist
- Air fryer is plugged directly into a stable 120V wall outlet with adequate clearance space
- Basket and crisper tray are clean, completely dry, and inserted securely
- Control panel is powered on and set to the desired preheat temperature
- Timer is set for 3 to 5 minutes to allow the internal chamber to reach optimal heat
- Food is added immediately after the preheat cycle finishes without overcrowding the basket
Important Notes:
- Always exercise extreme caution as the exterior and interior of the Bella air fryer reach high temperatures during preheating; use oven mitts and silicone utensils only.
- Never spray aerosol cooking sprays directly inside the air fryer basket, as the propellants can degrade the non-stick coating over time; use a mister with pure oil instead.
- If your air fryer displays an error code or fails to heat up during the preheat cycle, unplug the unit and contact Bella customer support for professional assistance.
- Estimated time required for preheating is 3 to 5 minutes, with zero financial cost beyond minimal electricity usage.
How to Preheat Digital Touch Screen Bella Air Fryer Models
Using the Dedicated Preheat Function
Many modern Bella digital air fryers feature a built-in preheat button on the touch panel. If your 2026 model has this smart feature, the appliance does the heavy lifting for you. The machine automatically pairs a high heat setting with a short countdown timer to prep the cooking chamber efficiently.
- Plug your Bella digital air fryer into a grounded wall outlet.
- Press the power icon to illuminate the digital touch control panel.
- Tap the dedicated Preheat button if available on your interface.
- Adjust the temperature using the arrows to match your recipe requirements, typically between 350°F and 400°F.
- Press the start/pause button and wait for the 3 to 5 minute cycle to finish.
Manual Preheating for Touch Screen Models
If your specific Bella digital touch screen model lacks a dedicated preheat button, you can easily mimic the process manually. This takes just seconds to program and delivers the exact same hot-start benefits. Do not leave the empty basket in the unit for longer than 5 minutes to protect the non-stick coating from overheating.
- Turn the unit on by pressing the main power button on the display.
- Set the cooking temperature to your recipe’s target heat level using the temperature control arrows.
- Set the timer manually to 3 to 5 minutes using the time adjustment buttons.
- Press start and wait for the unit to beep, signaling the end of the cycle.
- Pull out the basket, add your ingredients, and resume cooking immediately.
How to Preheat Analog Dial Bella Air Fryer Models
Analog dial Bella air fryer models require a manual approach since they lack digital temperature displays and preheat indicator lights. Without a dedicated preheat button, you must rely on the mechanical timer knob and the heating indicator light to reach your target cooking temperature.
Step-by-Step Dial Preheating
- Plug your Bella analog air fryer into a dedicated 120V electrical outlet.
- Turn the temperature control knob clockwise to your desired cooking temperature, referencing culinary guidelines or the 2026 Bella user manual.
- Turn the mechanical timer knob clockwise to the 3-minute to 5-minute mark to initiate the heating cycle.
- Verify the orange heating indicator light turns on, confirming the internal heating element is drawing power.
- Wait for the timer to reach zero and the bell to ring, or the heating light to cycle off, signaling that the interior has reached thermal equilibrium.
According to appliance durability studies, manually operated mechanical timers on countertop cookers maintain a tolerance within 10 percent of the set duration. Always add your food immediately after the cycle ends to prevent rapid heat loss from the bare metal basket.
What to Do If Your Bella Air Fryer Fails to Heat Up
If your Bella air fryer powers on but fails to generate heat during the preheat cycle, mechanical or electrical components may require troubleshooting. Follow these prioritized steps to diagnose and resolve the heating failure safely in 2026.
Troubleshooting Steps for Non-Heating Units
- Check the basket microswitch. Ensure the air fryer basket clicks completely into place, as a tripped safety switch prevents the heating element from activating.
- Inspect the power supply. Plug the unit into a different wall outlet and avoid using high-draw extension cords that can cause voltage drops.
- Examine the internal thermostat and thermal fuse. A blown thermal fuse, resulting from a power surge or obstructed airflow, permanently disables the heating circuit and requires replacement.
- Contact Bella customer support or a certified small appliance repair technician if internal electrical components are faulty. Professional repair services typically range from $40 to $70, which may exceed the replacement cost of budget-friendly air fryer models.
Conclusion
Mastering how to preheat your Bella air fryer ensures optimal crisping, even cooking, and extended appliance longevity. Whether you operate a modern digital touchscreen or a classic analog dial unit, dedicating 3 to 5 minutes to thermal preparation transforms your cooking results. According to verified research and culinary expert sources, consistent preheating reduces total cook times by up to 15 percent while destroying surface bacteria on raw ingredients. Take your next culinary step by selecting a favorite recipe and testing your preheated basket today.
❓ Frequently Asked Questions
Is preheating strictly necessary for every meal in a Bella air fryer?
While some frozen convenience foods can go straight into a cold basket, preheating is strongly recommended for raw meats, baked goods, and foods that require an immediate crispy sear.
How do I know when my digital Bella air fryer is finished preheating?
Digital models with a preheat function will typically beep, flash, or display a prompt like ‘Add Food’ on the screen once the target temperature is reached.
What should I do if my analog Bella air fryer won’t stay on?
Ensure the basket is pushed completely home until it clicks, and verify that the timer dial is turned past the 10-minute mark to engage the mechanical spring mechanism.
Can I use aluminum foil in the Bella air fryer while preheating?
You should never place loose aluminum foil in an empty basket during preheating because the circulating air can lift the foil and pull it into the heating element.
Does preheating increase the overall cooking time?
No, preheating actually decreases the risk of undercooking by ensuring the cooking chamber is already at peak temperature when the food goes in.
How do I clean the Bella air fryer basket after preheating and cooking?
Let the basket cool down completely, then wash it by hand using warm soapy water, a non-abrasive sponge, and a mild dish detergent.