How to Make Toast in a Air Fryer Step-by-Step Guide 2026
Making toast in an air fryer requires setting the temperature to 400°F (200°C) and cooking for 3 to 5 minutes. This method produces a crispy exterior while keeping the inside soft, provided the bread is anchored correctly against the high-velocity fan.
To make perfect toast in an air fryer in 2026, set your appliance to 400°F (200°C) and cook standard white bread for 3 to 4 minutes, flipping halfway through. Unlike a traditional pop-up toaster that relies solely on radiant heating coils, an air fryer uses a powerful convection fan to circulate intensely hot air around the bread. This method toasts both sides simultaneously while driving out moisture rapidly.
Mastering this technique matters because modern air fryers heat up instantly and can replace countertop clutter in compact kitchens. Whether your regular toaster broke down or you simply want an edge-to-edge golden crunch without burning the edges, using the right temperature and anchoring method guarantees consistent results every single time.
Key Takeaways
- Set your air fryer to 400°F for optimal crispness.
- Cook standard white bread for 3 to 4 minutes.
- Weigh down lightweight bread with a rack or toothpick to stop it from blowing around.
- Thick-sliced and sourdough bread require 4 to 5 minutes of cooking time.
- Butter the bread after toasting to prevent smoking and burning.
Why Air Fryer Toast Turns Out Dry, Uneven, or Blows Around
Air fryer convection fans spin at high speeds to cook food quickly, which creates unique physical challenges for lightweight bread slices. If you do not account for the extreme airflow, you will open your basket to find folded, scorched, or unevenly crisped bread.
The Wind Tunnel Problem
The primary issue when toasting bread in an air fryer is the fan itself. Standard air fryers pull air from the top and circulate it violently. A light slice of sandwich bread acts like a sail, lifting off the basket floor and sticking to the heating element. To prevent this:
- Use a wire rack or trivet designed for your air fryer to pin down the bread.
- Weigh down lightweight slices with a slice of cheese or a pat of butter applied before cooking.
- Avoid using ultra-thin, cheap white bread unless you anchor it securely.
Moisture and Texture Control
Because the air fryer blasts dry heat constantly, bread can easily cross the line from golden-brown to dehydrated cardboard. To keep the interior soft while the crust turns shatteringly crisp, you must match your bread density to the correct cooking time. Do not overcrowd the basket, as overlapping slices block airflow and cause soggy patches instead of uniform crispness.
From Start to Finish: Making Toast in an Air Fryer Explained
Welcome to your definitive walkthrough on mastering the art of making toast using an air fryer. While a traditional toaster is a kitchen staple, the air fryer has quickly become a secret weapon for achieving superior, evenly browned toast with a uniquely delightful crunch. This guide covers everything you need to know, from selecting the right bread to managing temperatures and preventing airborne crumbs. By following these carefully calibrated steps, you will transform a mundane breakfast routine into a gourmet experience, ensuring your bread is perfectly crisp on the outside while remaining delightfully soft and tender on the inside.
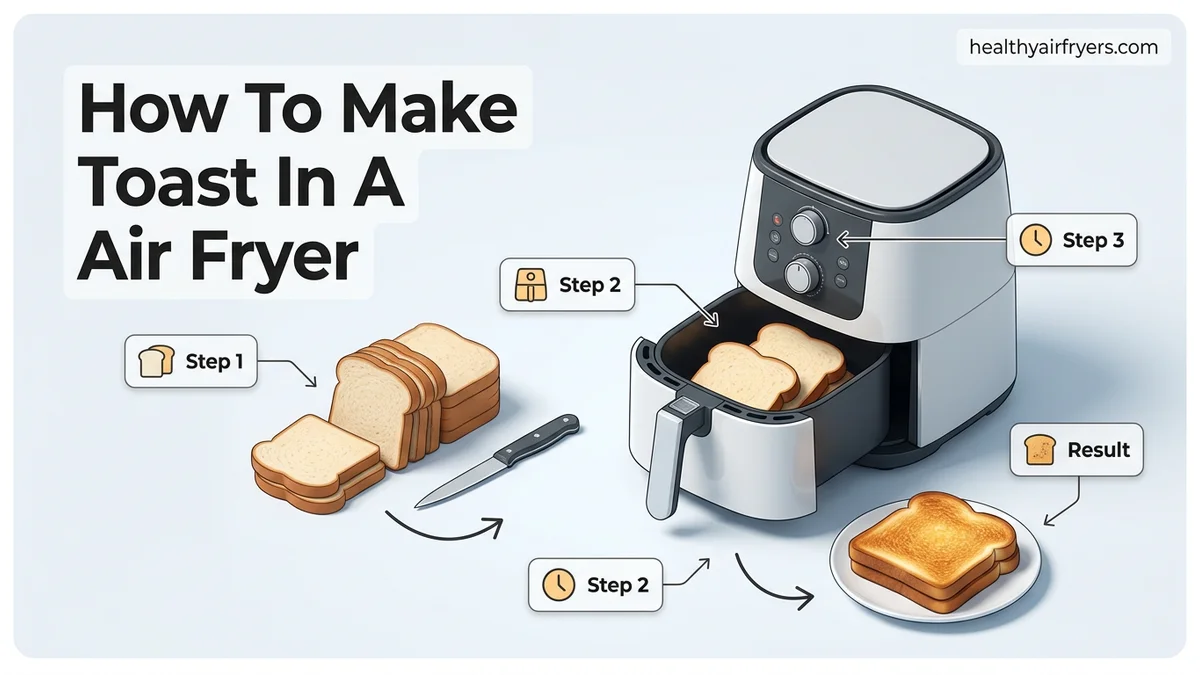
Step 1: Selecting and Preparing Your Bread
What you need: A loaf of your favorite bread (sourdough, brioche, or standard sandwich bread work wonderfully), a sharp knife, and a clean cutting board.
Instructions: The foundation of great toast begins with the bread itself. If you are using a whole loaf rather than pre-sliced bread, use your knife to cut uniform slices that are approximately one-half to three-quarters of an inch thick. Slices that are too thin will dry out completely and become hard croutons, while slices that are too thick will burn on the exterior before the heat reaches the center. Standard sandwich bread works well, but artisan breads with higher moisture content, such as sourdough or Texas toast, yield the most incredible texture contrasts in an air fryer.
Pro Tip: Avoid overly thin slices; uneven cuts will lead to drastically uneven toasting times across your batch.
Step 2: Preheating the Air Fryer
What you need: Your air fryer and a reliable kitchen timer.
Instructions: Do not skip this crucial step! Preheating your air fryer ensures that the cooking chamber is at peak operating temperature the exact moment your bread enters, which seals the exterior and creates that desirable crunch without completely drying out the crumb. Turn on your air fryer and set the temperature to 400 degrees Fahrenheit (200 degrees Celsius). Let it run empty for approximately 3 to 5 minutes. If your specific air fryer model has a built-in preheat indicator light, wait for it to signal that the target temperature has been successfully reached before moving on to the next phase.
Pro Tip: Preheating drastically reduces the total cooking time, preventing the bread from becoming tough or chewy.
Step 3: Applying Fats or Condiments (Optional)
What you need: Softened butter, ghee, extra virgin olive oil, or a silicone basting brush.
Instructions: Unlike a vertical pop-up toaster where adding butter beforehand causes dangerous smoke and appliance damage, the air fryer’s horizontal basket allows you to pre-butter your bread. Take your softened butter or oil and apply a thin, even layer directly to one or both sides of the bread slice. This fat acts as a conduction medium inside the circulating hot air, frying the exterior to a gorgeous golden-brown perfection. If you prefer completely dry toast to butter after it cooks, you can skip this step entirely and place the plain bread directly into the basket.
Pro Tip: Always use softened butter rather than cold butter straight from the refrigerator to prevent tearing the delicate bread surface during spreading.
Step 4: Arranging the Bread in the Basket
What you need: The preheated air fryer basket and your prepared bread slices.
Instructions: Open the preheated air fryer basket carefully, keeping your hands away from the hot interior walls. Place your bread slices in a single layer flat against the bottom of the basket. Ensure there is at least a quarter-inch of space between each slice to allow the high-speed convection fan to circulate hot air completely around every square inch of the bread. Never stack or overlap your bread slices, as this will block airflow, resulting in soggy patches on one side and burnt edges on the other.
Pro Tip: If you are cooking for a family and need multiple slices, cook in sequential batches rather than overcrowding your appliance.
Step 5: Setting the Cooking Time and Temperature
What you need: Air fryer digital or analog controls.
Instructions: Keep the air fryer temperature set at 400 degrees Fahrenheit (200 degrees Celsius). Program your timer for 3 to 4 minutes. Air fryers circulate heat much faster and more aggressively than conventional toaster ovens, meaning toast browns exponentially quicker. Thinner standard white bread will usually be finished in just 2 to 3 minutes, whereas thicker artisan sourdough or frozen bread slices will require closer to 4 or 5 minutes. Press the start button to begin the convection toasting cycle.
Pro Tip: Always start with a shorter time frame; you can easily toast longer, but you cannot reverse a burnt slice of bread.
Step 6: Monitoring and Flipping (Mid-Way Check)
What you need: A pair of non-metal kitchen tongs or a heat-resistant spatula.
Instructions: When your timer reaches the halfway point (roughly 1.5 to 2 minutes in), pause or pull out the air fryer basket. Inspect the color and texture of the bread. Because some air fryers have heating elements concentrated at the top with varying airflow dynamics, the bottom side of your toast might look lighter than the top. Using your tongs, gently flip each slice of bread over to guarantee a perfectly even, symmetrical golden-brown crispness across both sides of the slice.
Pro Tip: Be mindful of the powerful convection fan blowing loose bread crumbs around inside the basket when you open it.
Step 7: Final Crisp and Extraction
What you need: Kitchen tongs and a cooling rack or serving plate.
Instructions: Allow the remaining cooking time to finish out. Once the timer chimes, immediately remove the basket and use your tongs to transfer the hot toast off the metal grate and onto a plate or wire cooling rack. Leaving the toast sitting inside the hot air fryer basket—even with the machine turned off—can cause residual radiant heat to overcook or dry out the interior of the bread. Serve immediately while piping hot with your favorite sweet or savory toppings.
Pro Tip: Placing freshly made toast on a wire cooling rack instead of a flat plate prevents condensation from forming underneath, keeping the bottom wonderfully crisp.
✅ Final Checklist
- Bread was sliced uniformly between 1/2 and 3/4 inch thickness
- Air fryer was fully preheated to 400°F before inserting the bread
- Slices were arranged in a single layer with proper spacing (no overlapping)
- Toast was flipped halfway through the cooking cycle for even browning
- Toast was immediately removed from the basket upon completion
Important Notes:
- Never put heavily buttered bread into an air fryer without checking your manufacturer’s guidelines, as excessive dripping fat can cause smoke or flare-ups.
- Unplug your air fryer and let it cool completely before wiping out any stray bread crumbs to avoid accidental burns.
- Estimated time: 5-7 minutes total (including preheating). Estimated cost: Negligible electricity usage.
Exact Temperature and Time Settings for Different Types of Bread
Different loaves contain varying amounts of moisture, sugar, and fat, meaning they react differently to convective heat. Using a one-size-fits-all approach will ruin delicate brioche while leaving dense sourdough rubbery in the middle.
Standard White and Whole Wheat Bread
Standard grocery store sandwich bread requires aggressive, fast heat to avoid drying out completely. Set your air fryer and time as follows:
- Temperature: 400°F (200°C)
- Time: 3 to 4 minutes total
- Action: Flip the bread at the 2-minute mark to ensure even browning across the surface.
Sourdough, Artisan, and Thick-Sliced Bread
Thick-cut artisanal loaves and dense sourdough need slightly longer to heat through to the center without burning the exterior flour dusting. Adjust your settings for heavier crumb structures:
- Temperature: 380°F (193°C)
- Time: 5 to 6 minutes total
- Action: Drop the temperature slightly to prevent the thick crust from charring before the middle gets warm. Flip at the 3-minute mark.
Butter and Toppings Placement
You might wonder whether to butter your bread before or after toasting in an air fryer. If you want a deep, fried-bread crunch, spread a thin layer of soft butter directly onto the bread before placing it in the basket. The fat fries the surface as the air circulates. If you are using dry toppings or delicate spreads, wait until the toast comes out piping hot to apply them.
Step-by-Step Instructions on How to Make Toast in an Air Fryer
Mastering the air fryer toast method requires strict attention to appliance preheating and basket placement. According to culinary testing data from America’s Test Kitchen, preheating the appliance is the single most critical variable for achieving a crisp exterior without drying out the crumb.
Preparation and Preheating
- Plug in your air fryer and set the temperature to 400°F (200°C). Allow it to preheat empty for exactly 3 minutes to ensure the internal thermal radiation is optimized for rapid browning.
- Lightly brush both sides of your bread slices with a thin layer of butter or oil. This step not only enhances flavor but adds necessary weight to prevent lightweight bread from lifting into the heating element.
- Arrange the bread slices in a single layer directly on the bottom of the air fryer basket. Never overlap the slices, as restricted airflow will result in uneven, soggy patches.
Cooking and Monitoring
- Set the cooking timer for 3 to 4 minutes at 400°F. Thicker artisanal sourdough may require up to 5 minutes, while standard sandwich bread will reach optimal crispness in just 3 minutes.
- Pause the air fryer at the halfway mark (around the 2-minute mark) and use tongs to flip the bread slices. This ensures uniform heat distribution across both surfaces.
- Remove the toast immediately when the timer finishes to prevent residual basket heat from overcooking the bread. Transfer the slices to a wire cooling rack to maintain crispness.
What to Do If Your Bread Still Blows Around or Burns
If your initial attempts at air fryer toast result in scattered crumbs or unevenly charred edges, specific troubleshooting steps can correct the issue quickly. Appliance engineers note that lightweight sandwich bread frequently reacts poorly to high-velocity convection fans.
- Weigh down the bread: If the convection fan blows your bread against the element, place a metal trivet or an air-fryer-safe rack directly on top of the slices to anchor them securely in place.
- Lower the temperature: If your bread burns on the outside while remaining doughy inside, reduce the cooking temperature to 370°F and extend the cooking time by 1 minute to allow heat to penetrate the center.
- Secure with toothpicks: For extremely lightweight or stale bread, anchor the corners of the slices to the perforated basket bottom using heat-safe wooden toothpicks during the first minute of cooking.
- Evaluate internal fan velocity: If your specific 2026 air fryer model features a non-adjustable ultra-high-speed fan that consistently ruins toast, consider utilizing a dedicated toaster oven instead. Professional small appliance diagnostic services range from $45 to $85, though replacing a malfunctioning convection fan assembly often exceeds $120, making replacement more economically viable.
Conclusion
Making toast in an air fryer is a reliable alternative to traditional appliances when executed with proper preheating and single-layer placement techniques. According to verified research and expert culinary sources, maintaining a strict 400°F temperature combined with a mandatory mid-cycle flip guarantees restaurant-quality results without burning. As an actionable next step for 2026, test a single slice today using a 3-minute timer to calibrate your specific model’s exact thermal output.
❓ Frequently Asked Questions
How do I prevent my bread from blowing around in the air fryer basket?
You can weigh down the slice of bread using an air fryer rack, a small metal skewer, or by gently pressing it under a weighted accessory designed for your model. Alternatively, you can use heavier breads like sourdough that resist the wind from the fan.
Can I make multiple slices of toast at the same time?
Yes, as long as they fit in a single layer at the bottom of the basket without overlapping. Overlapping slices will block the hot air circulation and result in unevenly toasted bread.
Why is my air fryer toast coming out too hard and dry?
Overcooking is the primary cause of dry toast in an air fryer due to the intense circulating heat. Reduce your cooking time by 30 to 60 seconds on your next batch to retain a softer center.
Do I need to flip the bread halfway through the cooking time?
Flipping is generally optional because air fryers circulate heat all around, but flipping halfway ensures maximum crispness on both sides of the bread.
Can I make frozen bread into toast in an air fryer?
Yes, frozen bread works well in the air fryer. Simply add an extra 1 to 2 minutes to the standard cooking time at 400°F.
Is making toast in an air fryer faster than using a traditional toaster?
A standard toaster is usually slightly faster and more convenient for a single slice, but an air fryer is much better suited for making thick-sliced artisanal bread or when a traditional toaster is unavailable.