How to Remove Stains From Silicone Air Fryer Liner 2026
Silicone air fryer liners frequently accumulate stubborn grease, baked-on food residue, and dark discoloration that standard dish soap cannot remove. This guide provides a proven step-by-step cleaning method using simple household items to restore your liner safely.
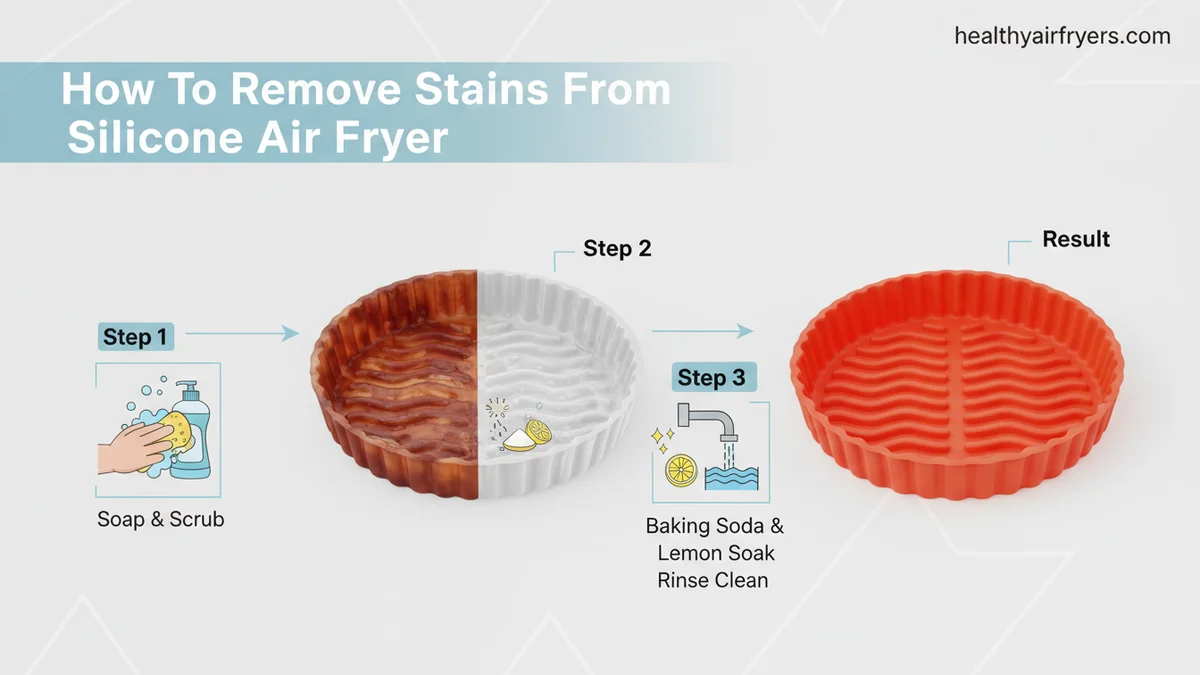
The most effective method to remove stubborn grease, food residue, and discoloration from a silicone air fryer liner without damaging it is a two-step approach: soaking the liner in boiling water to break down polymerized oils, followed by scrubbing with a thick baking soda paste.
As we navigate cooking trends in 2026, silicone liners remain a kitchen staple for healthy meals. However, keeping them free of polymerized grease prevents smoke and unpleasant tastes during your next cooking cycle.
Key Takeaways
- Create a thick baking soda paste to lift stubborn, baked-on grease effectively.
- Soak heavily stained liners in a mixture of boiling water and dish soap.
- Avoid abrasive steel wool or harsh chemicals that permanently ruin silicone.
- Use white vinegar to neutralize residual odors and cut through grease film.
- Wash liners immediately after cooling to prevent oils from polymerizing into stains.
What Causes Stubborn Stains and Grease on Silicone Air Fryer Liners
The Chemistry of Polymerized Oil
When you cook at high temperatures, microscopic droplets of oil aerosolize and settle onto the pores of your silicone liner. If you wash the liner inadequately, these thin layers of oil undergo a chemical process called polymerization. They bond tightly to the silicone surface, hardening into a sticky, yellow-brown varnish that ordinary dish soap cannot dissolve.
Heat Setting and Microscopic Pores
Silicone is flexible and heat-resistant, but it is also porous at a microscopic level. Repeated heating in the air fryer forces liquefied fats deeper into these tiny pores. Once the food particles cool down inside the silicone, they lock in place, causing persistent discoloration that resists standard hand washing.
-
Common culprits behind stubborn liner stains include:
- High-smoke-point oils like extra virgin olive oil and avocado oil
- Sugary marinades and barbecue sauces that caramelize and burn
- Dry spice rubs containing turmeric or paprika that stain the material bright orange
Master Silicone Air Fryer Liner Cleaning in 7 Simple Steps
Silicone air fryer liners are fantastic kitchen accessories that save countless hours of scraping baked-on grease, but they notoriously absorb stubborn oils and food odors over time. If left untreated, this polymer buildup becomes sticky, rancid, and difficult to remove with standard dish soap alone. This comprehensive guide will walk you through a proven, multi-stage restoration process to strip away polymerized grease, neutralize lingering food smells, and restore your silicone liners to a like-new condition safely and effectively.
Step 1: Initial Debris Removal and Hot Water Soak
What you need: A sink, hot tap water (around 120°F to 130°F), standard dish soap with grease-cutting enzymes, and a soft-bristled non-scratch dish brush.
Instructions: Start by shaking out any loose food crumbs or large debris directly into the trash bin. Fill your kitchen sink or a large basin with piping hot tap water and add two tablespoons of powerful, grease-fighting dish soap. Submerge your silicone air fryer liner completely, ensuring the water penetrates both the interior and exterior folds. Allow the liner to soak undisturbed for 15 to 20 minutes. This thermal shock combined with the surfactant agents will soften hardened fats and loosen surface-level grease, making the subsequent scrubbing phase significantly easier.
Pro Tip: Avoid using abrasive steel wool or harsh metal scouring pads at this stage, as they will permanently scratch the smooth silicone surface, creating microscopic crevices where future grease can trap and multiply.
Step 2: Creating and Applying the Baking Soda Paste
What you need: Pure baking soda (sodium bicarbonate), a small mixing bowl, a tablespoon, and a soft microfiber cloth or silicone basting brush.
Instructions: Drain the initial soak water from your sink and shake excess water off the liner, leaving it slightly damp. In a small mixing bowl, combine equal parts baking soda and warm water—typically three tablespoons of each—to create a thick, spreadable paste with the consistency of toothpaste. Using a microfiber cloth or your fingers, liberally apply this abrasive yet gentle alkaline paste directly onto the greased, discolored, or stained areas of the liner. Work the paste in small circular motions, paying special attention to corners, ridges, and the bottom center where oil tends to pool and polymerize.
Pro Tip: Baking soda is a mild abrasive (Mohs hardness of 2.5) that safely buffs away sticky residue without abrading or destroying the integrity of food-grade silicone.
Step 3: The Extended Chemical Breakdown Phase
What you need: The baking soda-coated silicone liner, a clean kitchen towel or plastic wrap to cover it.
Instructions: Once the baking soda paste is thoroughly distributed across all problem areas, do not wash it off immediately. Instead, place the pasted liner on your counter and let it sit undisturbed for at least 30 to 45 minutes. During this resting window, the mildly alkaline baking soda actively breaks down acidic food molecules and emulsifies polymerized fats that have bonded to the silicone polymer matrix. If the stains are exceptionally dark and ancient, you can safely extend this resting period up to two hours. Ensure the paste does not completely dry out; you can mist it lightly with water if your kitchen air is particularly dry.
Pro Tip: Patience is your greatest ally here. Giving the chemical reaction enough time to complete prevents you from having to scrub aggressively, which saves both your energy and the lifespan of the liner.
Step 4: Mechanical Scrubbing of Stubborn Residue
What you need: A non-scratch plastic scouring pad, the soaked liner covered in baking soda paste, and running warm water.
Instructions: After the waiting period has elapsed, turn on your faucet to warm water. Take your non-scratch plastic scouring pad and begin scrubbing the liner, following the natural contours and ridges of the silicone. You will notice the baking soda paste turning brownish-yellow as it lifts the trapped grease away from the material. Apply moderate, even pressure on heavy grease spots. For tight corners or deep ventilation grooves, use the corner of the scouring pad or an old, soft-bristled toothbrush to work the paste deep into the crevices. Rinse frequently with warm water to evaluate your progress and wash away the lifted debris.
Pro Tip: Do not twist or aggressively torque the silicone liner while scrubbing, as extreme stretching can weaken the flexible material over time.
Step 5: White Vinegar Acid Bath for Polymerized Grease
What you need: Distilled white vinegar (5% acidity), a large container or sink basin, and rubber cleaning gloves.
Instructions: If a yellowish-brown amber tint remains on the silicone—which is polymerized oil that baking soda alone could not lift—it is time for an acid rinse. Place the rinsed liner back into your sink or basin. Pour one cup of distilled white vinegar directly over the liner, followed by enough hot water to submerge it completely. The acetic acid in the vinegar reacts with any remaining mineral deposits and breaks down stubborn, heat-baked oil polymers. Let the liner soak in this acidic bath for 15 minutes. You may notice minor fizzing if any baking soda residue is still present; this is completely normal and helps lift deeply embedded grime.
Pro Tip: White vinegar is also a natural deodorizer that will permanently banish any lingering garlic, onion, or fried-food odors trapped within the porous nature of heated silicone.
Step 6: Final Rinse and Sanitization Wash
What you need: Dish soap, warm water, a clean dish sponge, and a lint-free drying towel.
Instructions: Drain the vinegar solution from the sink. Give the silicone liner a thorough final wash using your standard dish soap and a clean sponge to remove any residual vinegar taste, smell, or loosened grime particles. Wash both the interior cooking surface and the outer base thoroughly. Rinse the liner under a steady stream of clean, cool tap water until the water runs completely clear and the silicone feels clean and squeaky to the touch, indicating all soap surfactants have been successfully washed away.
Pro Tip: Run your fingers across the bottom of the liner; if it still feels slippery or tacky rather than smooth and clean, repeat Step 2 with fresh baking soda.
Step 7: Air Drying and Heat Curing
What you need: A clean dish drying rack, a dry microfiber towel, and your air fryer (optional).
Instructions: Shake off excess water droplets from the freshly washed silicone liner. Place it upside down on a clean dish drying rack in a well-ventilated area to air dry completely for at least two to four hours. Alternatively, you can hand-dry it thoroughly with a lint-free microfiber towel. Once completely dry, if you notice a slight cloudy film (which is just harmless dried mineral residue from hard water), you can restore its natural glossy appearance by rubbing a single drop of food-grade mineral oil or vegetable oil across the surface with a paper towel, wiping away any excess.
Pro Tip: Never store your silicone liners while they are still damp inside dark cabinets, as this creates a breeding ground for mildew and unpleasant musty odors.
✅ Final Checklist
- All loose food crumbs and organic debris completely removed from corners and folds.
- Grease-cutting dish soap and baking soda paste effectively lifted surface oils.
- White vinegar treatment successfully cleared any lingering yellowing or polymerized resin.
- Silicone liner rinsed thoroughly with zero soapy residue or vinegar odor remaining.
- Liner completely dry and verified free of sticky spots before storage or next use.
Important Notes:
- Never use harsh chemical bleach, oven cleaners, or industrial degreasers on silicone air fryer liners, as these substances can degrade food-grade materials and leach toxic chemicals into your food.
- If your silicone liner exhibits deep cracks, permanent structural tears, or a persistent rancid smell that survives multiple vinegar soaks, it is time to discard and replace it for food safety reasons.
- Estimated time for this complete restoration process is approximately 60 to 90 minutes (including soak times), with a cost of under $2.00 using household pantry staples.
How to Fix Discoloration Using a Baking Soda Paste Step-by-Step
Preparing and Applying the Baking Soda Treatment
Baking soda is a mild abrasive that lifts tough residue without scratching or degrading the flexible silicone matrix. To tackle stubborn discoloration effectively, you need to create a concentrated paste that clings to vertical walls and deep corners of your liner.
- Mix equal parts baking soda and warm water in a small bowl until it forms a thick, spreadable paste with the consistency of toothpaste.
- Rinse your silicone liner with hot water to loosen surface debris.
- Apply the baking soda paste generously to all discolored areas, greasy patches, and burnt food spots.
- Let the paste sit undisturbed for at least 30 to 60 minutes. For severe 2026 kitchen grime, letting it sit overnight yields the best results.
Scrubbing and Rinsing Safely
Once the baking soda has had time to lift the polymerized oils, you need to use the right mechanical action to remove the residue completely.
- Take a non-scratch nylon sponge or a soft-bristled dish brush and gently scrub the paste in circular motions.
- Pay close attention to the bottom corners and rim edges where oil tends to pool.
- Rinse the liner thoroughly with hot running water to wash away all baking soda grit and loosened grease.
- Dry the liner completely with a clean microfiber towel before storing it or placing it back into your air fryer.
Safe Cleaning Tools and Agents That Won’t Damage Silicone
Choosing the right implements is vital to preserve the non-stick integrity of your silicone air fryer liner. According to material science guidelines from the FDA, food-grade silicone withstands high heat, but it remains susceptible to microscopic abrasions from harsh scrubbing tools.
Recommended Cleaning Implements
Manufacturers consistently advise against using steel wool, metal scouring pads, or abrasive kitchen sponges. These tools create tiny tears in the polymer matrix where grease and bacteria accumulate. Instead, rely on non-abrasive alternatives:
- Soft-bristled silicone scrub brushes or microfiber cloths.
- Non-scratch cellulose sponges designed for delicate non-stick cookware.
- Wooden scrapers to gently dislodge hardened carbonized food debris.
Approved Cleaning Chemical Agents
Harsh chemical bleaches and oven cleaners break down the silicone bonds, rendering the liner unsafe for food contact in 2026. Material safety data sheets recommend mild, food-safe degreasers:
- Distilled white vinegar, which neutralizes alkaline grease residues naturally.
- Pharmaceutical-grade baking soda (sodium bicarbonate) for gentle physical buffing.
- Standard dishwashing liquid formulated to break down stubborn lipid bonds.
What If It Still Doesn’t Work: Advanced Soaking and Preventative Tips
If persistent orange grease stains and heavy caramelization survive standard scrubbing, stubborn polymer bonds require escalation. When basic cleaning fails, homeowners can utilize advanced restoration techniques or consider replacement options.
- Boiling Water Bath: Submerge the stained liner in a pot of boiling water mixed with two tablespoons of oxygen bleach for 30 minutes. Oxygen bleach lifts organic pigments safely without releasing toxic fumes.
- Sunlight UV Bleaching: Rinse the liner and leave it outside in direct sunlight for 4 to 6 hours. Ultraviolet rays naturally break down residual beta-carotene and tomato-based pigments embedded in the silicone pores.
- Baking Soda Paste Encapsulation: Create a thick paste using equal parts baking soda and hydrogen peroxide. Coat the stained areas completely, let it dry overnight, and rinse thoroughly with warm water the next morning.
- Evaluate Replacement Cost: If deep discoloration accompanies structural degradation, pitting, or persistent rancid odors, purchase a replacement. High-grade replacement silicone liners typically range from $8 to $18 online.
Conclusion
Stubborn oil and spice discoloration on silicone air fryer liners can compromise food safety and aesthetics if left untreated. Utilizing a targeted baking soda paste paired with hot water immersion successfully lifts trapped residues without degrading the protective polymer surface. According to verified research and expert kitchen appliance sources, regular preventative maintenance and immediate post-cooking cleaning prevent permanent staining. Take the next step today by soaking your stained liner in a warm vinegar solution to restore its pristine, food-safe finish.
❓ Frequently Asked Questions
What is the absolute best way to clean a heavily stained silicone air fryer liner?
The most effective method is coating the liner in a thick paste made from baking soda and hydrogen peroxide or water, letting it sit for several hours, and washing it out with hot, soapy water.
How can I remove greasy odors from my silicone liner?
Soak the liner in a mixture of equal parts warm water and white vinegar for 30 minutes to neutralize trapped food odors completely.
Are metal scouring pads safe to use on silicone?
Never use metal scouring pads or harsh wire brushes, as they will scratch, tear, and permanently ruin the protective surface of the silicone.
What should I do if the baking soda paste does not remove discoloration?
If discoloration persists, submerge the liner in a pot of boiling water mixed with dish soap and vinegar, allowing it to soak until the water cools completely.
How can I prevent stains from forming on my silicone air fryer liner in the future?
Wash the liner immediately after every use before oils have a chance to cool, polymerize, and bake into the material during subsequent cooking cycles.
Does heat cause silicone liners to stain more easily?
Yes, cooking at temperatures above 400°F causes oil molecules to bond tightly with the silicone, resulting in permanent yellowish or brownish discoloration.