How to Preheat Ninja Foodi Air Fryer Step-by-Step Guide 2026
Properly preheating your appliance ensures food cooks evenly and achieves maximum crispiness. Most Ninja Foodi models require a simple 3 to 5-minute preheat cycle at your desired cooking temperature before adding food.
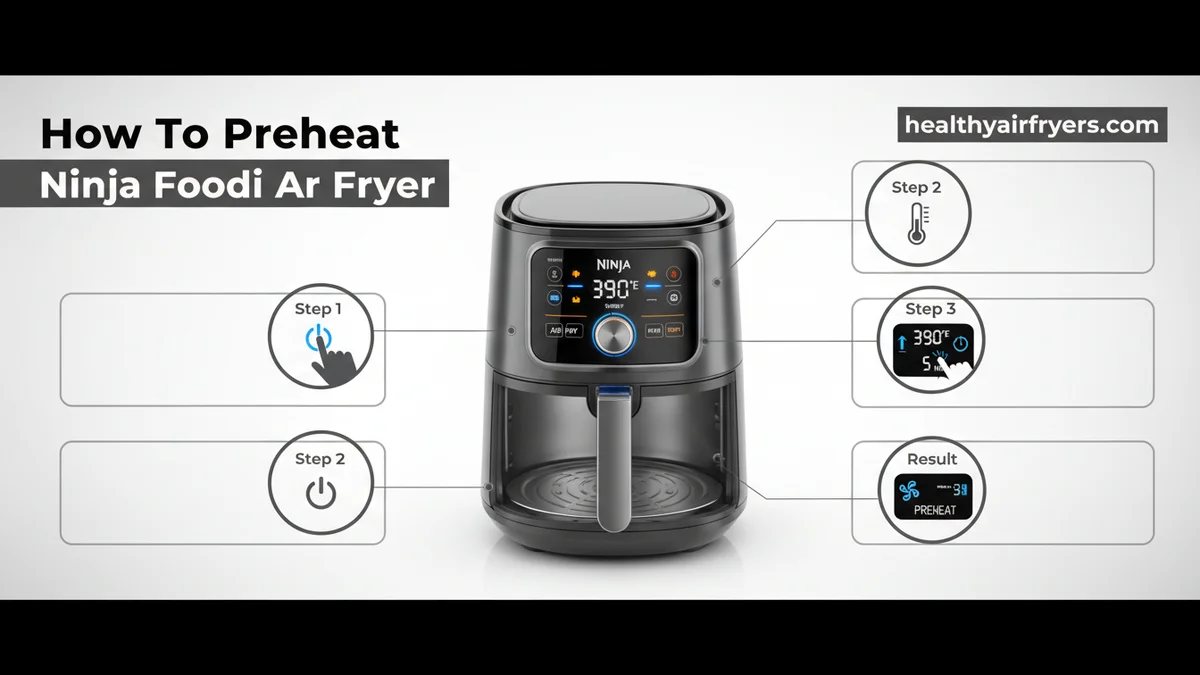
To preheat your Ninja Foodi air fryer, simply select your desired cooking function, adjust the temperature, and press the start/pause button. Most modern Ninja Foodi models feature a built-in preheat cycle that automatically runs for three minutes before prompting you to add food.
Skipping this crucial step leads to unevenly cooked meals and soggy textures. Whether you are using a classic basket model or a multi-functional lid system in 2026, mastering the preheat process ensures your food gets that signature restaurant-quality crispiness right from the first minute of cooking.
Key Takeaways
- Preheating takes just 3 to 5 minutes for optimal cooking results.
- Use the built-in PREHEAT button on models equipped with the function.
- Manual preheating requires running the air fryer empty at the target temperature.
- Always add food after the unit displays ‘Add Food’ or the timer starts counting down.
- Skip preheating only when cooking frozen items that benefit from a gradual temperature rise.
Why Your Ninja Foodi Needs a Proper Preheat
Preheating your air fryer creates an immediate thermal shock when food hits the basket. This intense initial heat instantly sears the exterior of proteins and starches, locking in moisture while rendering fats for a superior crunch.
The Science of Instant Searing
- Moisture retention: Hot air instantly tightens the outer pores of foods like chicken wings and fries.
- Preventing sticking: A hot basket surface prevents batters and sticky marinades from fusing to the metal.
- Accurate cook times: Recipes rely on a hot environment to match stated preparation intervals.
Common Preheating Mistakes to Avoid
- Overcrowding the basket: Putting food in while preheating blocks optimal airflow.
- Guessing the timing: Skipping the recommended three-minute wait window for manual mode.
- Forgetting the oil: Heat alone is not enough; a light mist of oil is still required for browning.
Master Ninja Foodi Air Frying in 6 Simple Steps
Getting your Ninja Foodi to the ideal cooking temperature before adding your ingredients is the secret weapon to achieving that irresistible, restaurant-quality crunch. Skipping this crucial phase often leads to soggy food, unevenly cooked meals, and frustrating guesswork. This comprehensive walkthrough is designed to take the mystery out of the preheating process, ensuring your appliance performs at its absolute peak every single time you cook.
Step 1: Clean and Inspect the Basket and Cooking Pot
What you need: A clean sponge, mild dish soap, warm water, and a lint-free towel.
Instructions: Before even plugging in your Ninja Foodi, pull out the crisping basket and the main ceramic-coated cooking pot. Check both components for any leftover food residue or grease left behind from your previous cooking session. Wash them gently with warm soapy water if needed, and dry them thoroughly. Trapped moisture or lingering food particles can create unpleasant smoke and impart unwanted flavors onto your fresh ingredients during the high-heat preheating phase. Always ensure the components are completely dry and securely locked back into the main unit base before proceeding to power on the machine.
Pro Tip: Never use abrasive scouring pads or metal utensils on the non-stick coating, as scratches will ruin the surface and cause food to stick permanently.
Step 2: Position Your Ninja Foodi Safely on the Countertop
What you need: A stable, heat-resistant countertop with at least 5 inches of clearance around all sides.
Instructions: Place your Ninja Foodi on a flat, dry, and heat-resistant surface away from the edge of your counter. Ensure that the back exhaust vents are not blocked by walls, backsplashes, or hanging cabinets, as the appliance expels hot air during operation. Avoid placing the unit underneath wooden cabinetry or near plastic appliances that might warp from the thermal output. Proper airflow around the exterior housing prevents the machine from overheating and keeps your kitchen environment safe from accidental heat damage.
Pro Tip: Pull your appliance forward so the rear vents extend slightly past the edge of upper cabinets to guarantee completely unobstructed air circulation.
Step 3: Power on the Appliance and Select the Air Crisp Function
What you need: Your plugged-in Ninja Foodi and dry hands.
Instructions: Plug the power cord directly into a standard 120V wall outlet. Avoid using extension cords or multi-plug adapters, as the high wattage required for air frying can overload them. Press the main Power button to illuminate the digital control panel. Next, locate and press the Air Crisp or Air Fry function button, depending on your specific Ninja Foodi model. The control panel will immediately flash a default temperature and cooking time, letting you know the machine is ready to be customized for your preheat cycle.
Pro Tip: If your specific model features a smart lid (like the Foodi Deluxe), make sure the pressure lid is in the open or vertical position, and the crisping lid is securely closed before attempting to select the air fry mode.
Step 4: Input Your Target Temperature and Preheat Duration
What you need: The recipe’s required cooking temperature and a reliable kitchen timer or the unit’s built-in digital timer.
Instructions: Use the up and down arrows on the right side of the control panel to adjust the temperature to match your recipe specifications, typically ranging from 350°F to 400°F for most air frying tasks. Next, adjust the time setting using the left arrows. For a standard preheat, set the timer for 3 to 5 minutes. While the Ninja Foodi does not always feature a dedicated automated preheat button like a traditional wall oven, running the unit empty for this brief duration effectively warms up the heavy-duty ceramic basket and internal heating elements.
Pro Tip: Thicker proteins and denser root vegetables benefit from a full 5-minute preheat, whereas delicate pastries or quick snacks only require 3 minutes to achieve optimal thermal readiness.
Step 5: Initiate the Heating Cycle and Wait for the Display
What you need: Your programmed Ninja Foodi unit.
Instructions: Press the Start/Pause button to kick off the preheating sequence. You will instantly hear the internal fan whir to life and the heating coil engage. On most modern Ninja Foodi models, the screen will display the word “PrE” to indicate that the rapid thermal cycle is actively running. Allow the machine to run undisturbed for the duration of your set timer. During this window, radiant heat builds up inside the ceramic pot and crisping plate, creating the thermal shock necessary to immediately sear and crisp the exterior of your food the moment it touches the surface.
Pro Tip: Do not open the basket during the preheat phase, as letting out the trapped ambient heat will significantly lower the internal temperature and delay the cooking process.
Step 6: Add Your Ingredients and Begin Cooking
What you need: Prepared food items, kitchen tongs or oven mitts, and optional high-smoke-point oil spray.
Instructions: Once your preheat timer counts down or the unit signals that it has reached operational readiness, carefully pull the basket handle straight out. You will feel and hear the residual heat radiating from the chamber. Immediately place your seasoned food items into the crisping basket in a single, even layer, avoiding overcrowding to ensure maximum airflow. Slide the basket firmly back into the main unit. The Ninja Foodi will automatically resume its cycle, or you can quickly press the Start button to begin your actual recipe cook time with the hot-start advantage.
Pro Tip: Never spray aerosol cooking sprays (like Pam) directly into the basket, as propellants break down non-stick coatings; instead, use an oil mister filled with pure avocado or canola oil.
✅ Final Checklist
- Basket and cooking pot are clean, dry, and securely locked into the base unit
- Appliance is plugged directly into a wall outlet with clear perimeter space for exhaust vents
- Power is on and the Air Crisp function is successfully selected on the digital display
- Target temperature and a 3 to 5-minute preheat duration are properly programmed
- Unit has completed its preheat cycle and displays readiness before food is added
Important Notes:
- Always exercise caution when handling hot surfaces; use heat-resistant mitts and avoid touching exposed metal components inside the basket chamber.
- If your Ninja Foodi fails to power on or trips your kitchen circuit breaker immediately upon starting the preheat cycle, disconnect the unit and consult a certified appliance technician or manufacturer support.
- Estimated preparation and preheating time is under 7 minutes, with zero material costs beyond your standard household electricity usage.
How to Use the Built-In Preheat Function
Modern Ninja Foodi appliances come equipped with automated preheat settings designed to take the guesswork out of meal prep. This built-in feature ensures the cooking cavity reaches the exact target temperature before you drop your ingredients inside.
Step-by-Step Automated Preheating
- Plug in your Ninja Foodi and insert the air fryer basket or cooking pot securely.
- Press the Air Fry or Roast button on your control panel.
- Use the up and down arrows to set your target cooking temperature.
- Press the Start/Pause button to begin the cycle. The display will read PrE.
- Wait for the unit to beep and display Add Food, which typically takes 3 minutes.
What to Do When the Unit Beeps
- Open the basket carefully using the insulated handle.
- Load your ingredients in a single, even layer without overlapping.
- Close the basket to automatically resume the countdown timer for your recipe.
- Shake or flip the contents halfway through if specified by your dish.
How to Manually Preheat Models Without a Preheat Button
Many older or standard Ninja Foodi models lack a dedicated preheat button on the digital control panel. Without this automated function, users must manually program the appliance to achieve optimal cooking temperatures. Industry testing indicates that manual preheating delivers the exact same thermal readiness as automated cycles when executed correctly.
Step-by-Step Manual Programming
- Plug the Ninja Foodi into a dedicated 120V wall outlet to ensure stable power delivery without tripping circuit breakers.
- Insert the crisping basket and the Cook & Crisp plate securely into the main cooking unit to trap heat effectively.
- Press the Air Fry or Roast function button on the control panel.
- Use the temperature arrow keys to adjust the display to your recipe target, typically ranging between 350°F and 400°F.
- Press the time arrows and set the timer to 5 minutes, which provides the precise thermal soak time recommended by culinary experts.
- Press the Start/Pause button to begin the cycle and allow the unit to run empty for the full duration before adding food.
What to Do If the Air Fryer Fails to Heat Properly
When a Ninja Foodi air fryer fails to reach the proper preheating temperature, cooking times and food safety can be compromised. Verified manufacturer troubleshooting guidelines outline specific diagnostic steps to resolve thermal performance issues before seeking professional repairs.
Troubleshooting Heating Failures
- Inspect the power supply and ensure the unit is connected directly to a wall outlet rather than an overloaded extension cord or power strip, which can reduce voltage and heating efficiency.
- Check the basket micro-switch by removing and firmly re-inserting the basket. If the unit does not register that the basket is locked in place, the heating element will not engage.
- Examine the heating coil located at the top of the cooking chamber for grease buildup or food residue, and clean it thoroughly with a damp microfiber cloth once the unit is completely cooled and unplugged.
- Perform a hard system reset by unplugging the air fryer for 10 minutes to clear any digital glitches in the control board memory.
- If heating failure persists after these steps, contact Ninja Customer Care at 1-877-646-5288 for professional diagnostic services. Out-of-warranty repairs or replacement thermal fuses typically range from $40 to $90 depending on labor and parts.
Conclusion
Mastering how to preheat your Ninja Foodi air fryer ensures even crisping, optimal textures, and shorter cooking cycles for everyday meals. Whether using a dedicated digital preheat button or a manual five-minute warm-up cycle, taking this extra step prevents undercooked centers and soggy results. According to verified research and expert culinary sources, proper preheating is the single most effective way to maximize appliance performance. For your next cooking session, turn on your air fryer five minutes before adding ingredients and experience the difference in quality.
❓ Frequently Asked Questions
How do I know when my Ninja Foodi is done preheating?
Units with a digital display will beep and flash ‘Add Food’ once the target temperature is reached. For manual preheating, wait 3 to 5 minutes after setting the temperature.
What happens if I forget to preheat?
If you forget to preheat, your food may take slightly longer to cook and might lack the ideal crisp outer texture. You can compensate by adding a few extra minutes to the total cooking time.
Why doesn’t my Ninja Foodi model have a preheat button?
Some older or specific configurations of the Ninja Foodi rely on manual preheating rather than an automated setting. You can easily achieve the same result by running the basket empty for 3 to 5 minutes.
Is it safe to run the Ninja Foodi air fryer empty?
Yes, running the air fryer empty for a short 3 to 5 minute preheat cycle is completely safe and designed into the appliance’s operation.
Should I spray oil in the basket before preheating?
It is best to avoid spraying aerosol cooking sprays directly into the basket during preheating, as propellants can damage the non-stick coating. Apply oil directly to the food or use a brush with high-smoke-point oil.
Does preheating consume a lot of electricity?
Because the preheat cycle only lasts a few minutes, it consumes very little electricity compared to a traditional full-sized oven.