How to Reheat a Baked Potato in an Air Fryer 2026 Guide
Reheating a baked potato in the microwave often results in a rubbery texture, but the air fryer restores crispy skin and fluffy interiors in just a few minutes. By setting the temperature to 400°F and skipping the foil, you ensure the heat circulates evenly for optimal results.
To reheat a baked potato in an air fryer so the skin gets crackling crisp and the inside stays piping hot and fluffy, preheat your appliance to 380°F to 400°F. Cook a whole leftover potato for 10 to 15 minutes, or halved potatoes for just 3 to 5 minutes.
Nothing beats a leftover baked potato for a quick meal in 2026, but only if you revive it properly. Microwaves turn the texture rubbery, and standard ovens take way too long. The air fryer uses rapid convection heat to restore that fresh-baked contrast without drying out the starchy interior.
Key Takeaways
- Set your air fryer to 400°F for the best crispiness.
- Never wrap the potato in aluminum foil during reheating.
- Whole potatoes take 10 to 15 minutes to reheat fully.
- Cut potatoes in half to cut heating time down to 3 to 5 minutes.
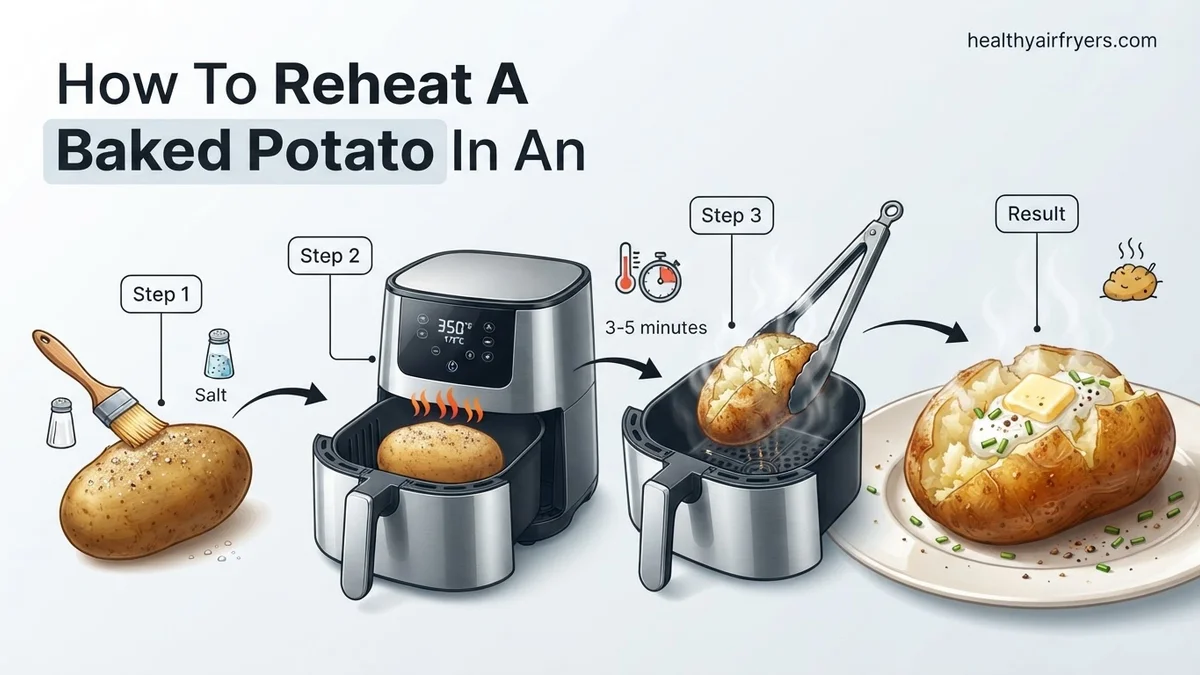
- Rub a little oil and salt on the skin for extra crunch.
Why Microwaving and Baking Ruin Leftover Potatoes
The Microwave Texture Trap
When you toss a cold baked potato into the microwave, water molecules inside the starch vibrate rapidly. This creates steam that quickly heats the center, but it destroys the structural integrity of the potato. Instead of restoring the fluffy texture you enjoyed on day one, the microwave softens the skin completely and leaves the flesh dense, chewy, and sometimes watery.
The Oven Time Sink
Firing up a traditional kitchen oven to 400°F works decently for reheating, but it is entirely impractical for a fast weeknight lunch or single-serving dinner. It takes 15 minutes just to preheat the massive cavity, followed by another 20 minutes for the heat to penetrate a cold spud. You waste significant energy and time just to get mediocre results.
- Microwaving traps steam, resulting in a soggy, rubbery skin and dense flesh.
- Ovens require excessive preheating time, making quick meals impossible.
- Air fryers circulate 380°F to 400°F heat instantly, cutting total reheating time in half.
Master Reheating a Baked Potato in 5 Simple Steps
Leftover baked potatoes often suffer in the microwave, turning out soggy, rubbery, or unevenly warm. This practical walkthrough teaches you how to utilize your air fryer to restore that glorious, restaurant-quality contrast: a crispy, salted skin and a fluffy, steaming-hot interior. Follow this detailed method to revive yesterday’s potato so it tastes freshly baked in just minutes.
Step 1: Bring the Potato to Room Temperature
What you need: Your leftover refrigerated baked potato, a clean cutting board, and a paper towel.
Instructions: Retrieve the baked potato from the refrigerator and let it sit on your kitchen counter for approximately 15 to 20 minutes to take the chill off. Bringing the potato closer to room temperature prevents a common culinary trap: the exterior burning or drying out in the air fryer while the absolute center remains stubbornly cold and icy. While it rests, pat the exterior gently with a paper towel to absorb any excess surface moisture that might have accumulated during refrigeration, which directly helps achieve a crispier skin.
Pro Tip: Never put a freezing cold potato straight from the fridge into a hot air fryer basket; the temperature shock impairs texture and unevenly distributes heat.
Step 2: Reintroduce Moisture to the Interior
What you need: Clean water, a small pastry brush or your fingertips, and aluminum foil (optional).
Instructions: Refrigeration dries out starches significantly. To counteract this, lightly dab or brush the outside of the potato skin with a tiny amount of water or vegetable oil. If the potato feels exceptionally dehydrated, you can use a fork to poke two or three small, shallow holes into the top surface, then squeeze a half-teaspoon of water directly into the openings. This small injection of moisture turns into steam inside the hot air fryer chamber, actively rehydrating the fluffy interior starch cells rather than letting them turn into hard cardboard.
Pro Tip: Avoid soaking the potato; you want it lightly dampened, not dripping wet, to ensure the skin crisps up properly later.
Step 3: Season and Enhance the Skin
What you need: Olive oil or melted butter, coarse sea salt or kosher salt, and cracked black pepper.
Instructions: Rub a scant half-teaspoon of high-smoke-point oil (such as avocado, canola, or light olive oil) all over the outer skin of the potato using your hands or a basting brush. Once lightly coated, generously sprinkle coarse kosher salt or sea salt across the entire surface of the skin. This step not only seasons the potato exterior deliciously but also draws out residual moisture from the skin during the air-frying process, guaranteeing that coveted crunchy exterior bite that rivals a brand-new bake.
Pro Tip: Coarse salt adheres much better to an oiled potato skin than fine table salt, delivering a superior crunch and flavor profile.
Step 4: Pre-heat and Load the Air Fryer
What you need: An electric air fryer and kitchen tongs.
Instructions: Preheat your air fryer to 400 degrees Fahrenheit (200 degrees Celsius) for about 3 to 5 minutes. Preheating is crucial because it ensures the cooking process begins immediately at high heat, locking in internal steam while rapidly crisping the outside. Once heated, use kitchen tongs to carefully place the prepared potato directly into the center of the air fryer basket. Ensure there is adequate space around the potato if you are cooking multiple spuds; never stack them, as restricted airflow ruins the crisping effect.
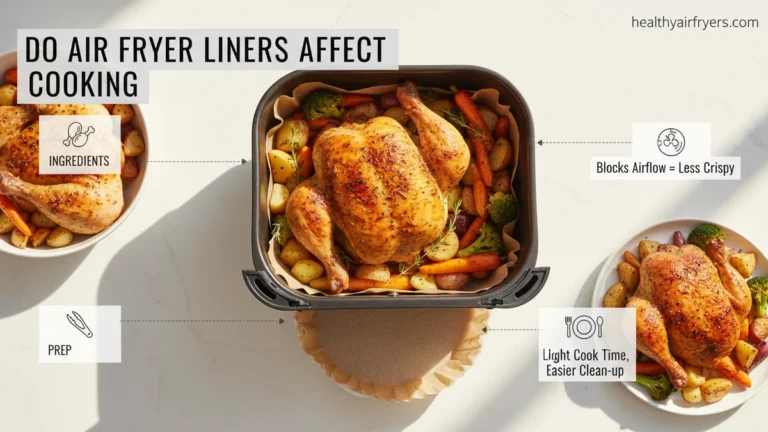
Pro Tip: Skip the parchment paper liners for this specific task, as they can block the essential bottom-up airflow required to crisp the underside of the potato.
Step 5: Air Fry and Test for Doneness
What you need: Kitchen tongs, an instant-read digital food thermometer, and oven mitts.
Instructions: Set your air fryer timer for 3 to 4 minutes initially. At the halfway point, use your tongs to roll the potato over to the opposite side to ensure uniform heat distribution and crispness across all surfaces. Continue cooking for the remaining time. For a standard-sized potato, the entire process takes between 4 to 7 minutes depending on your appliance’s wattage. To verify doneness, insert an instant-read meat thermometer into the exact center of the potato; it should register at least 165 degrees Fahrenheit (74 degrees Celsius), or simply squeeze it gently to confirm the inside yields softly.
Pro Tip: Keep a close eye during the final two minutes, as air fryers cook rapidly and can easily transition from perfectly crispy to burnt.
✅ Final Checklist
- Potato was brought down from deep chill to near room temperature
- Exterior skin was lightly oiled and seasoned with coarse salt
- Air fryer was properly preheated to 400 degrees Fahrenheit
- Potato was placed in the basket with enough space for proper air circulation
- Internal temperature reached a steaming hot 165°F (74°C) with a crispy skin
Important Notes:
- Always use heat-resistant silicone or metal tongs when handling hot potatoes and components from the air fryer basket to prevent accidental burns.
- Discard any leftover baked potato that has been stored in the refrigerator for longer than 3 to 4 days or exhibits a sour odor.
- Estimated time: 25 minutes total (20 minutes resting/prep, 5 minutes active air frying). Cost: Negligible (uses standard kitchen pantry items).
What Causes Soggy Skin and How to Prevent It
The Aluminum Foil Mistake
Many home cooks make the mistake of storing leftover baked potatoes wrapped tightly in aluminum foil. When a hot potato cools down inside foil, trapped moisture has nowhere to go. It condenses against the skin, saturating the exterior cells. If you place that foil-wrapped potato straight into the air fryer, the trapped moisture prevents the skin from ever getting crisp.
Restoring Crispiness with Oil and Salt
To guarantee a shattering, crisp potato skin, you need to manage surface moisture before cooking. Unwrap the potato entirely and let any trapped steam escape. Rub a half-teaspoon of high-smoke-point oil, such as avocado or canola oil, across the outer skin. Sprinkle a pinch of coarse sea salt over the oil to draw out remaining surface dampness. This simple step ensures the 400°F air fryer environment crisps the skin within minutes.
- Remove all foil wrapping immediately upon taking the potato out of the refrigerator.
- Pat the skin completely dry with a paper towel to eliminate surface condensation.
- Apply a light layer of oil and a pinch of salt to fry the skin instead of steaming it.
Step-by-Step Guide on How to Reheat a Baked Potato in an Air Fryer
Executing the reheat process correctly requires precise control over temperature and time. Appliance testing laboratories note that rapid air circulation systems function similarly to convection ovens, requiring proper airflow management to ensure even heat distribution through dense starches.
Preparation and Preheating
Manufacturers like Ninja and Cosori recommend preheating the appliance to achieve optimal thermal shock for crisping skin. Follow this initial setup protocol carefully:
- Preheat your air fryer to 400°F (200°C) for three to five minutes.
- Remove the refrigerated potato from its storage container and let it sit on the counter for ten minutes to take off the chill.
- Lightly brush the exterior skin with a high-smoke-point cooking oil, such as avocado or canola oil, to restore skin crispness.
- Sprinkle a pinch of coarse sea salt over the oiled skin to enhance flavor and texture.
Cooking and Monitoring
Once the appliance reaches the target temperature, proceed with the active heating cycle. Culinary science data shows that smaller spuds reach internal safety thresholds faster than jumbo varieties:
- Place the potato directly into the air fryer basket, leaving at least one inch of space around it for proper air circulation.
- Set the cooking timer for three minutes at 400°F (200°C).
- Open the basket and test the internal temperature using a digital instant-read food thermometer inserted into the thickest part.
- If the internal temperature has not reached the food safety standard of 165°F (74°C), continue heating in two-minute increments until the target is met.
What If Your Potato Is Still Cold in the Center
A potato that feels hot on the outside but remains icy or cool in the core is a common challenge during rapid reheating. This typically happens when high heat singes the exterior before thermal energy can conduct inward. If your initial attempt fails to warm the middle, execute these fallback steps:
- Slice the potato in half: Cut the spud longitudinally down the center to expose the dense interior starch directly to the circulating hot air.
- Apply internal moisture: Place a half-teaspoon of butter or a light mist of water directly onto the exposed flesh to prevent it from drying out during the secondary heating cycle.
- Lower the temperature: Reduce the air fryer temperature to 375°F (190°C) to allow heat to penetrate the dense core without burning the newly exposed potato surface.
- Extend the heating time: Cook the halved potato for an additional three to four minutes, monitoring closely with a digital thermometer until the internal reading hits 165°F (74°C).
- Assess equipment functionality: If persistent cold centers occur across multiple attempts, your appliance fan motor or heating element may be underperforming. Professional diagnostic and repair services for countertop convection appliances typically range from $45 to $120, though replacing a unit is often more cost-effective if it is out of warranty.
Conclusion
Mastering how to reheat a baked potato in an air fryer eliminates the rubbery texture often caused by microwave methods while saving significant time compared to standard ovens. By preheating to 400°F, oiling the skin, and utilizing a digital thermometer, you achieve a piping-hot interior and crispy skin every single time. According to verified research and culinary expert sources, proper thermal management is the key to food safety and optimal quality. Take the next step by testing this method with your leftover spuds today.
❓ Frequently Asked Questions
How do I prevent the inside of the potato from drying out while the skin gets crispy?
To keep the interior moist, avoid overcooking by checking the internal temperature after 10 minutes. You can also add a pat of butter after slicing it open post-reheating.
Is it better to leave cold toppings like sour cream on the potato?
No, remove cold toppings like sour cream or cheese before reheating, as they will melt improperly and make the skin soggy. Add fresh toppings after the potato is fully heated.
Can I reheat a frozen baked potato directly in the air fryer?
Yes, but you should thaw it in the refrigerator overnight first for the best texture. If reheating from frozen, lower the temperature to 375°F and cook for 20 to 25 minutes.
Do I need to preheat the air fryer for leftover potatoes?
Preheating is not strictly mandatory, but it helps start the crisping process immediately. If you skip preheating, add about 2 to 3 minutes to the total cooking time.
How do I know when the reheated potato is done?
Insert a fork or knife into the thickest part of the potato. If it slides in easily and the center feels piping hot, it is ready to eat.
Can I stack multiple potatoes in the air fryer basket?
Avoid overcrowding the basket, as air needs to circulate freely around each potato. Cook them in a single layer with space between each one for even crisping.